
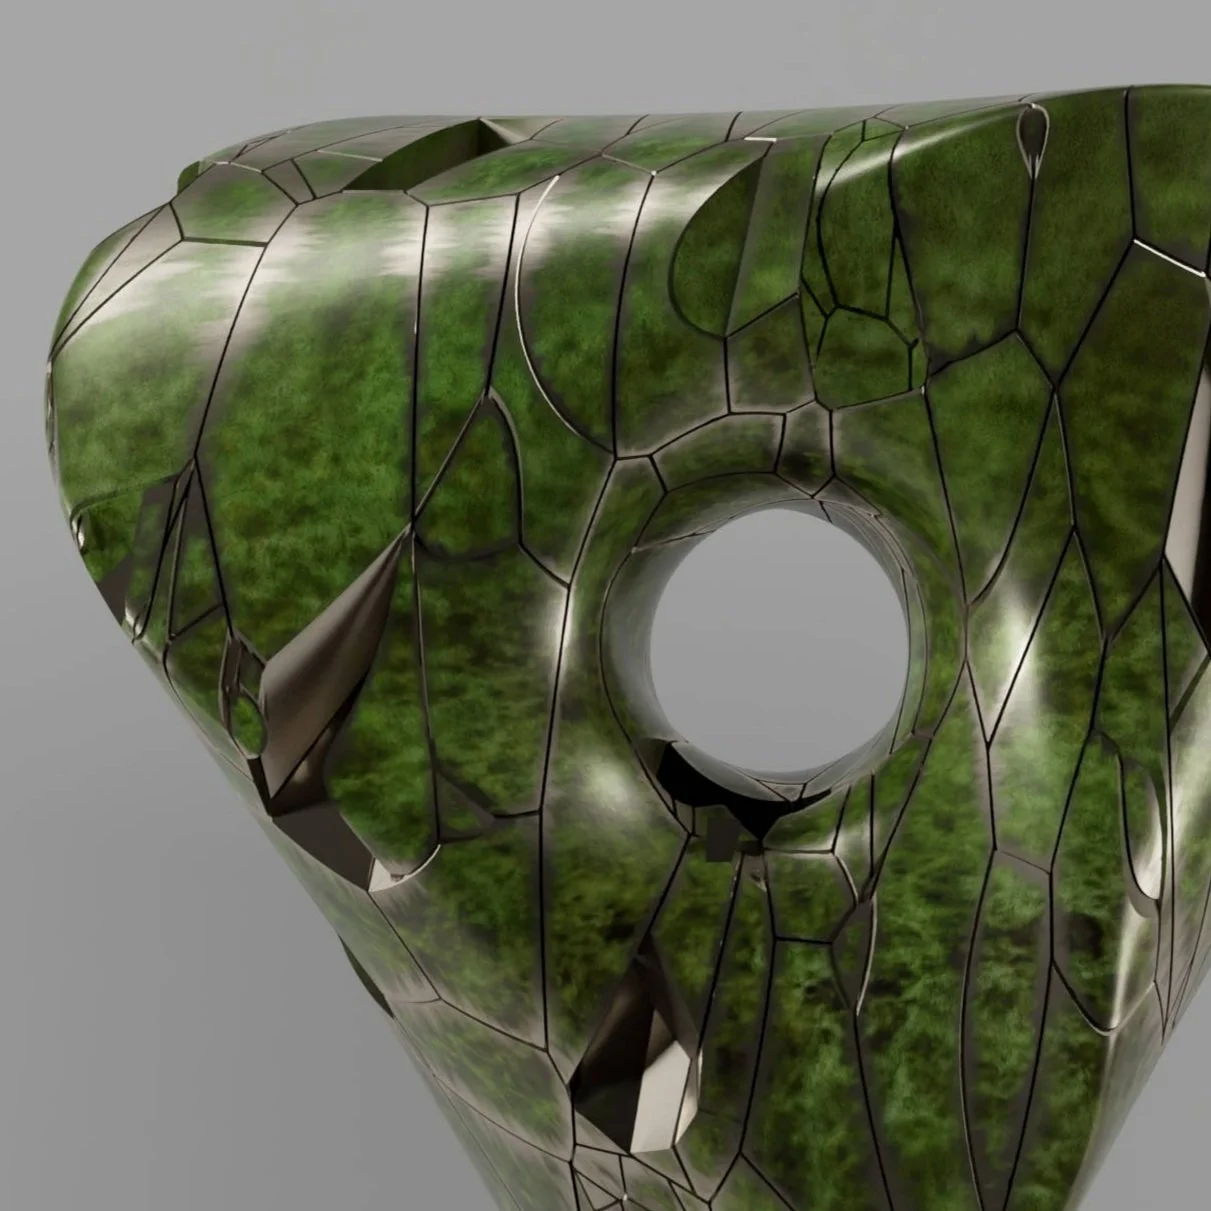
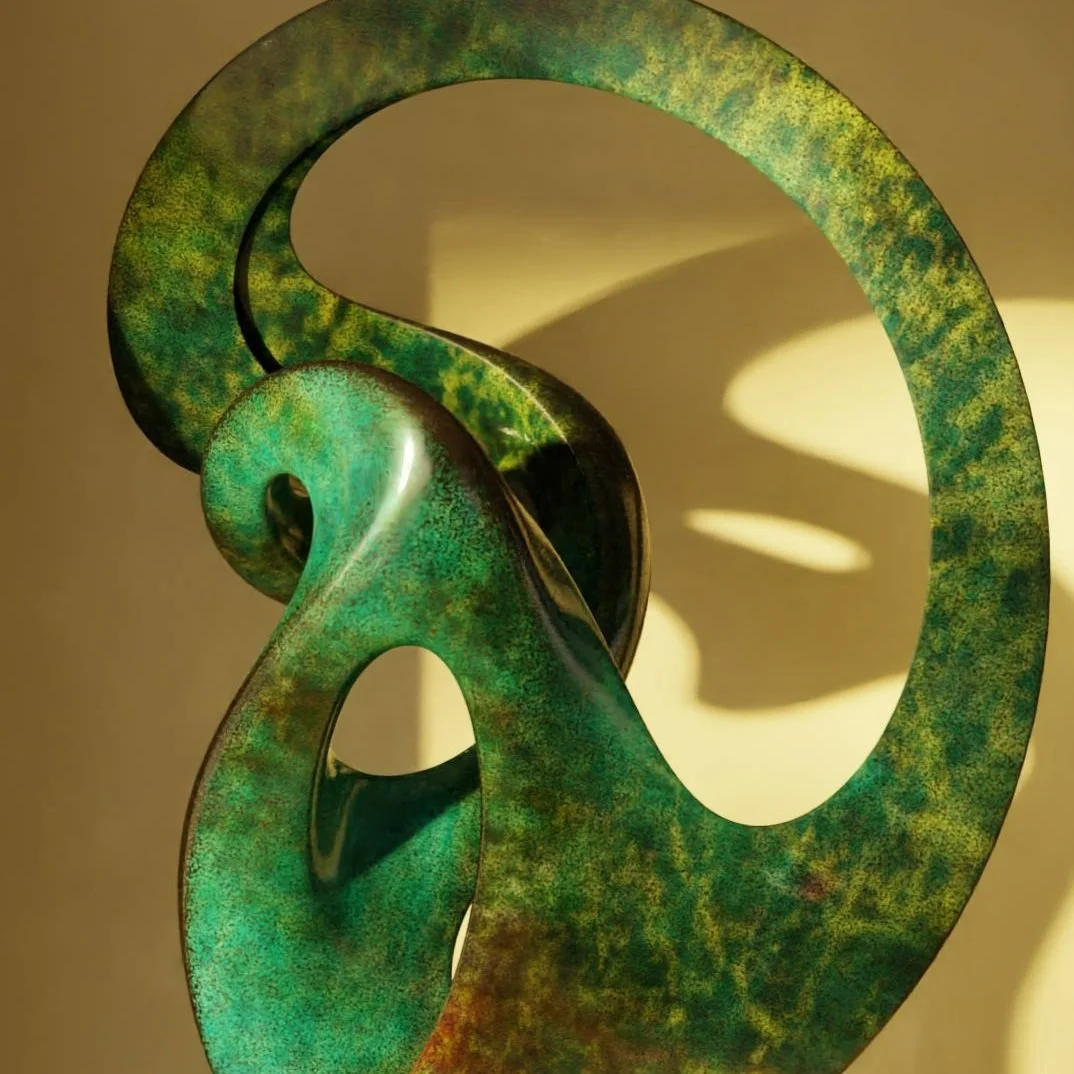
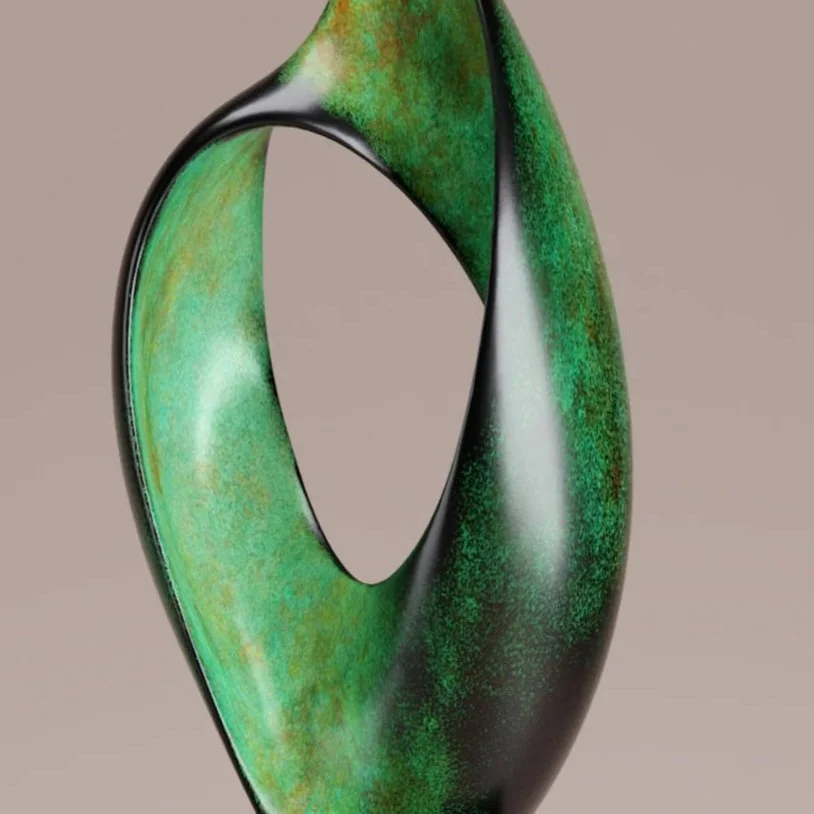

Standard Emerald Green Patina
Description
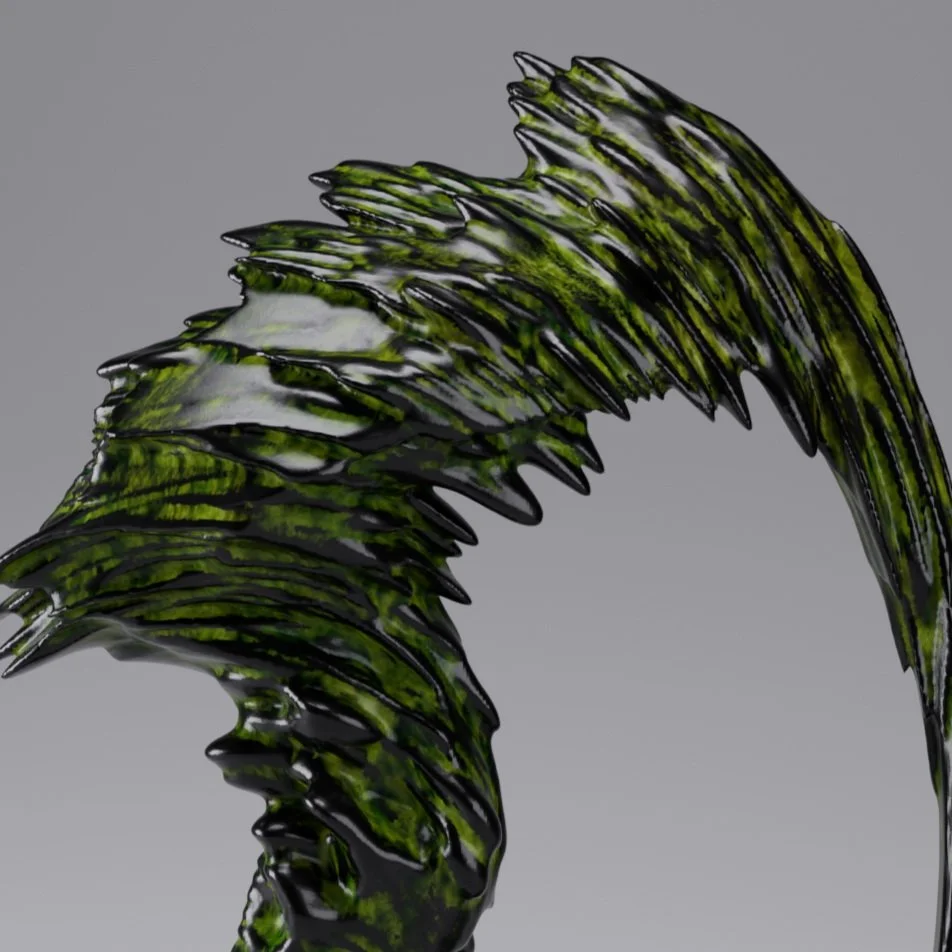
A very stable vibrant emerald green patina, with a light detailing and dark background. Genuine Chromium Oxide is the key colouring agent in this patina, it adheres incredibly well to the bronze with the right fixative and doesn't seem affected when heated even to a high heat. As with all pigment based patinations, the surface can easily become overloaded with the pigment and with chromium it tends to create an opaque solid colour very easily. A good even application of chemical and a dark base coat is important to help achieve a good contrast between colours.
Metal Preparation
Silicon bronze / Sanded to 80 - 120 grit
Base Coat Chemical Options
M20 / Antiquing Solution / Liver of Sulphur
Base Coat Application
Warm bronze very gently, apply weak solution of basecoat. You want the bronze to change colour gradually, continue applying solution to develop a good even colour. Rinse the surface with water and a brush, this removes some of the residue and helps to neutralise the chemical reaction. Heat the bronze until a fine dusty film appears on the surface, remove this with 120 grit scotchbrite pad or other appropriate soft abrasive.
1st Colour Coat Recipe
Water ----- 250 ml
Weak copper nitrate solution ------ 1 teaspoon
Chroumium oxide ------ 1/2 teaspoon
Additional fixative ----- 40 % percent sodium silicate solution
1st Colour Coat Application
Heat the bronze evenly, the solution should just sizzle and evaporate away as you apply it with a natural haired paint brush. Take small amounts of solution into brush at each application, as the brush warms up it natural sucks the solution up into the brush. Use a small brush to stir the solution keeping the oxide in suspension, chromium quickly settles out. The oxide that forms on the surface of the bronze should develop into a green mottled pattern. This patina is at it most vibrant when you work over a good dense base coat and try to apply the green as a mottled broken layer, leaving the base coat visible in places. Use small amount of solution at a time, any pooling or runs tend to leave very dense areas of opaque oxide.
2nd Colour Coat
Water ----- 250 ml
Strong Copper Nitrate solution ------ 3-4 teaspoons
Additional Fixative ----- 40% sodium silicate solution
2nd Colour Coat Application
The bronze will still be hot from the first solution, be careful with the heating of the copper nitrate solution, its very easy to over heat turning the oxide yellow. The solution should just sizzle and evaporate away as you apply it with a natural haired paint brush. Take small amounts of solution into brush at each application, as the brush warms up it natural sucks the solution up into the brush. Apply the solution with a delicate dab or touch of the brush, let the solution evaporate on the surface of the bronze leaving an oxide that forms into a strong light blue white pattern. The difficulty is achieving an even loose naturalistic pattern, its very easy to have area of tense tight pattern when you start. Work with a good size brush, the pattern formed is usually just slightly larger than the brush head. The result is a even broken pattern of light blue patterning over the mottled green 1 st coat, the light blue will ideally look over powering and out of balance with the green at this stage.
3rd Colour Coat
Water ----- 250 ml
Medium Copper Nitrate solution ------ 2 teaspoons
Chromium Oxide ------ 1/2 teaspoon
Additional Fixative ----- Weak sodium silicate solution
3rd Colour Coat Application
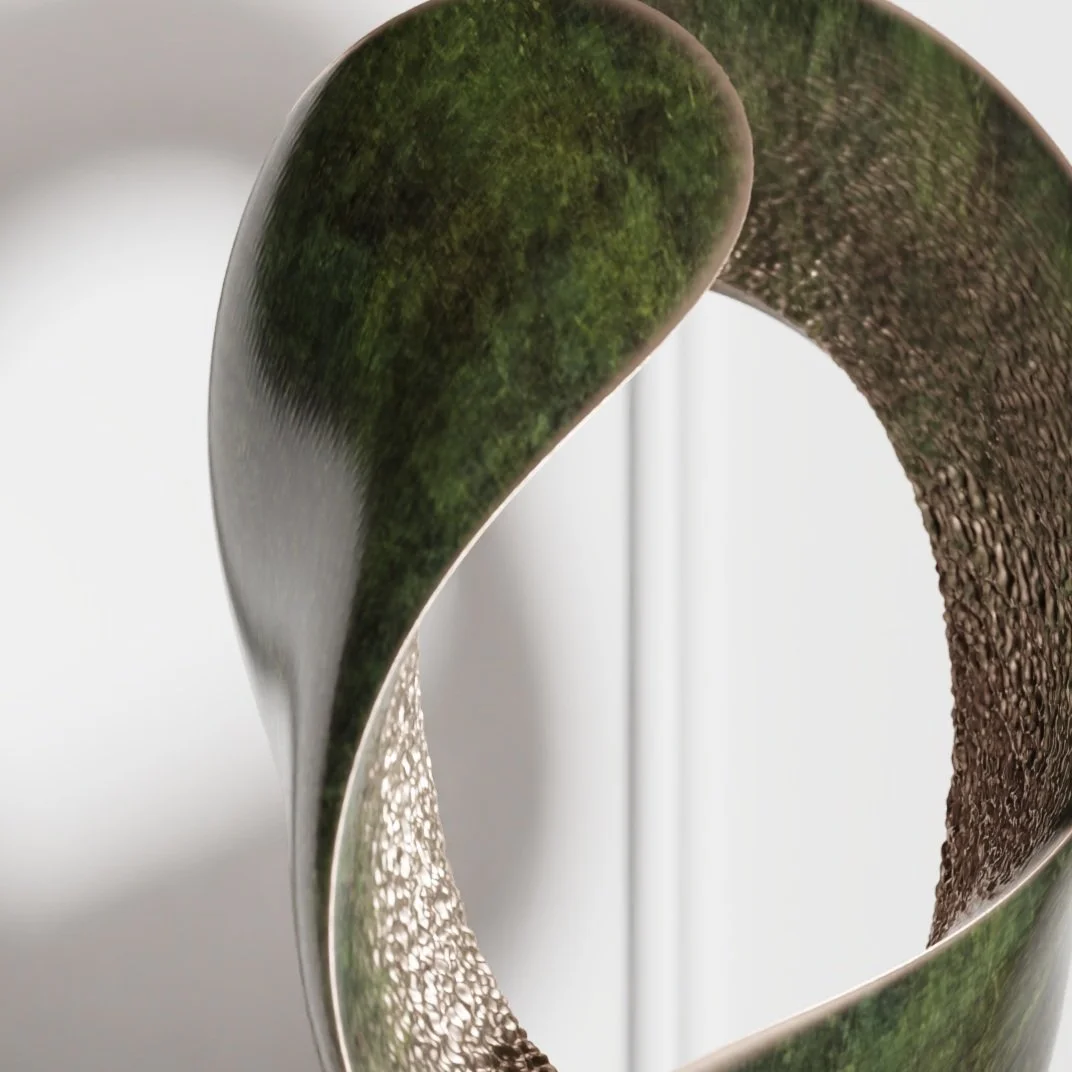
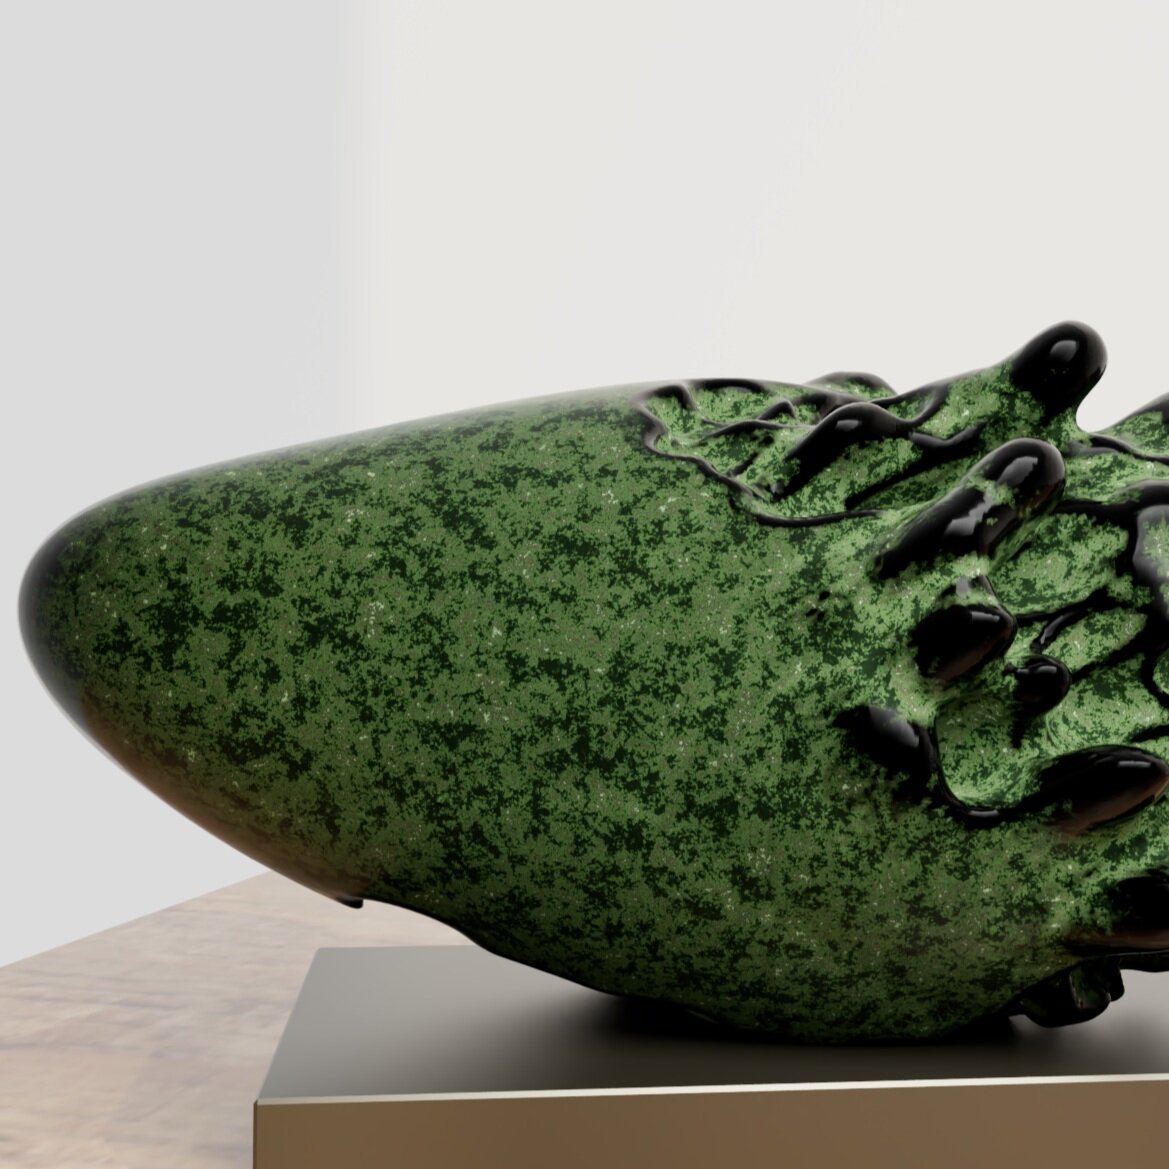
The bronze will remain hot after the first 2 coats of chemicals, don't let the bronze cool at this stage. Reheating from cold the copper nitrate oxide, will leave it turning brown and patchy. As before the solution should just sizzle and evaporate away as you apply it with a natural haired paint brush. Take small amounts of solution into brush at each application, as the brush warms up it natural sucks the solution up into the brush. Use a small brush to stir the solution keeping the oxide in suspension, chromium quickly settles out. Ideally the oxide that forms on the surface of the bronze should develop into an intense intense green patterning. The purpose of the final layer is to create a depth in the patina from layering and to mute the intense copper nitrate patterning. The difference between a unwaxed patina and a waxed patina is at times vast and you have to develop an understanding of how the sealant or wax has an impact upon the different patinas. I have illustrated this with the images above, the definition of the patterning becomes dispersed but the intensity of colour is increased. The way it was described to me, was to imaging the patina, is like a dusty pebble found on a beach which often look nondescript, but dip it in the water and it becomes gem like with a depth of colour and patterning.
Sealing Solutions
Sculpt Nouveau Smart Coat / 1K Polymer Sealant / Incralac Lacquer
Application
When the bronze is at room temperature, we use soft cloth or brush to apply 3 coats, letting them fully dry between applications.
Highlighting
To add additional colour to highlight areas, we mix a small amount of pigment with a small amount of sealant and use a sponge or brush to add this mixture.
Darkening Shadowing
To create shadows or to darken areas we use a graphite wax, this is thinned down with a clear wax to create a translucent paste. This is applied both under final wax layers or over the final wax layers.
Final Wax layers
I use renaissance wax for the final waxing. Its applied with a soft brush in a very thin layer, left for 10 mins and buffed to a hard finish. We add three or four layers, with the final layer buffed to the final finish.